A Logic App workflow that uses Filter array, Select and Join actions
Create a Logic App workflow that uses a Recurrence trigger, initializes a variable with JSON data, filters the array, uses Select and Join actions, and performs additional operations.
Scenario
- The workflow triggers on a schedule (Recurrence trigger).
- Initialize a variable with an array of JSON objects.
- Filter the array based on a condition.
- Use the Select action to transform the filtered array.
- Use the Join action to concatenate the transformed data.
- Send the result in an email or save it to a file.
Step-by-Step Workflow
Step 1: Create a Logic App
- Go to the Azure portal.
- Click on Create a resource > Integration > Logic App.
- Provide a name, subscription, resource group, and location for your Logic App.
- Click Review + create and then Create.
Step 2: Add a Recurrence Trigger
- Open your Logic App in the designer.
- Search for the Recurrence trigger and add it.
- Configure the recurrence interval (e.g., every day, every hour, etc.).
- Interval: 1
- Frequency: Day (or Hour, depending on your requirement)
Step 3: Initialize a Variable with JSON Data
- Add a new action after the Recurrence trigger.
- Search for Initialize variable and add it.
- Configure the variable:
- Name:
jsonData - Type:
Array - Value: Paste your JSON data as an array. For example:
[
  { "id": 1, "name": "John Doe", "email": "john@example.com", "age": 30 },
  { "id": 2, "name": "Jane Smith", "email": "jane@example.com", "age": 25 },
  { "id": 3, "name": "Alice Johnson", "email": "alice@example.com", "age": 35 }
]
- Name:
Step 4: Filter the Array
- Add a new action after the Initialize variable action.
- Search for Filter array and add it.
- In the From field, select the
jsonDatavariable. - Set the filter condition. For example, filter objects where
ageis greater than 30:- Condition:
item()?['age'] > 30 - This will filter the array to include only objects where the
agefield is greater than 30.
- Condition:
Step 5: Use the Select Action
- Add a new action after the Filter array action.
- Search for Select and add it.
- In the From field, select the output of the Filter array action.
- Use the Map section to transform the filtered array. For example:
- Key:
name - Value:
item()?['name'] - Key:
email - Value:
item()?['email']
- Key:
- This will create an array of objects with only the
nameandemailfields.
Step 6: Use the Join Action
- Add a new action after the Select action.
- Search for Join and add it.
- In the From field, select the output of the Select action.
- Specify the Join with delimiter. For example, use a comma (
,):- This will concatenate the values into a single string.
Step 7: Send an Email with the Result
- Add a new action after the Join action.
- Search for Gmail (or your email provider) and select Send email (V2).
- Connect to your email account.
- Fill in the email details:
- To: Recipient email address
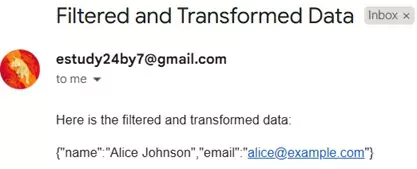
- Subject:
Filtered and Transformed Data - Body: Insert the output of the Join action. For example:
Here is the filtered and transformed data:
@{body('Join')}
Here's how Logic App should look:

Testing the Workflow
- Save and run the Logic App.
- The workflow will:
- Trigger based on the recurrence schedule.
- Initialize the JSON data.
- Filter the array.
- Transform the filtered array using Select.
- Concatenate the transformed data using Join.
- Send an email with the result.
Sample Output
You can download the logic app template from the estudy247 GitHub repository – la-test-dataops-12