JavaScript code inline in Azure Logic Apps workflow
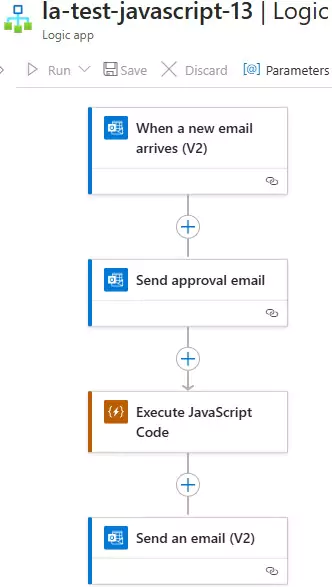
A Logic App workflow that triggers when a new Outlook email arrives, sends an approval email, executes JavaScript code, and performs additional actions.
Scenario
- Trigger the workflow when a new email arrives in Outlook.
- Send an approval email to a user.
- Wait for the user’s response (approve/reject).
- Execute JavaScript code based on the response.
- Send a confirmation email.
Step-by-Step Workflow
Step 1: Create a Logic App
- Go to the Azure portal.
- Click on Create a resource > Integration > Logic App.
- Provide a name, subscription, resource group, and location for your Logic App.
- Click Review + create and then Create.
Step 2: Add an Outlook Trigger
- Open your Logic App in the designer.
- Search for the Outlook connector and select When a new email arrives (V2).
- Sign in to your Outlook account to authorize the connection.
- Configure the trigger:
- Folder: Inbox (or any specific folder)
- Include Attachments: No (or Yes, if needed)
- Importance: Any (or High, if needed)
- Include Attachments: No (or Yes, if needed)
- Only with Attachments: No (or Yes, if needed)
Step 3: Send an Approval Email
- Add a new action after the Outlook trigger.
- Search for Approvals and select Send approval email.
- Configure the approval email:
- User Options: Approve/Reject
- Subject:
Approval Request - Body:
Do you want to approve this email? - Assigned To: Enter the email address of the approver.
Step 4: Execute JavaScript Code
- Add a new action after the Send approval email action.
- Search for Inline Code and add it.
- If this is your first time using the Inline Code action, you will be prompted to create an Integration Account. Follow the prompts to create one.
- Write your JavaScript code snippet. For example:
// Check if the approval response is "Approve"
var response = workflowContext.actions.Send_approval_email.outputs.body.SelectedOption;
var output = (response === "Approve") ? "Approved" : "Rejected";
return output;
Step 5: Perform Additional Actions
- Add a new action after the Inline Code action.
- Use the output of the JavaScript snippet in subsequent actions. For example:
- Send a confirmation email.
- Save the result to a file.
Here's how Logic App should look:
Example Workflow
- Outlook Trigger:
- Trigger: When a new email arrives in Outlook.
- Send an Approval Email:
- Subject:
Approval Request - Body:
Do you want to approve this email? - Assigned To:
approver@example.com
- Subject:
- Inline Code Action:
- Code:
// Check if the approval response is "Approve"
var response = workflowContext.actions.Send_approval_email.outputs.body.SelectedOption;
var output = (response === "Approve") ? "Approved" : "Rejected";
return output;
- Code:
- Send Confirmation Email:
- To:
sender@example.com - Subject:
Approval Result - Body:
The email has been @{body('Execute_JavaScript_Code')}.
- To:
Testing the Workflow
- Save and run the Logic App.
- Send a test email to your Outlook account.
- The workflow will:
- Trigger when the email arrives.
- Send an approval email to the approver.
- Execute JavaScript code to determine the result.
- Send a confirmation email with the result.
Sample Output
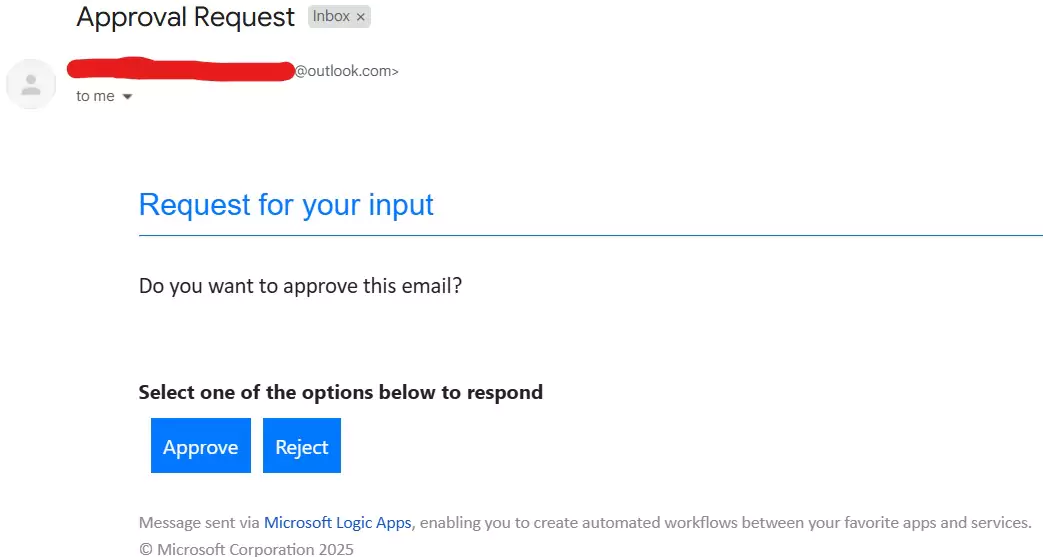
The approval request email will look like this:
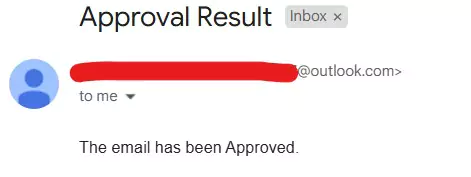
The confirmation email will look like this:
You can download the logic app template from the estudy247 GitHub repository – la-test-javascript-13