Installing or Uninstalling DLL into GAC
To install a DLL in the Global Assembly Cache (GAC) on a Windows server, you can use the gacutil tool, which is part of the .NET Framework SDK. Here’s a step-by-step guide:
1. Ensure the DLL is Strong-Named
Only strong-named assemblies can be installed in the GAC. You can create a strong name using the sn.exe tool or via Visual Studio’s project properties under the Signing tab.
Only strong-named assemblies can be installed in the GAC. You can create a strong name using the sn.exe tool or via Visual Studio’s project properties under the Signing tab.
2. Locate gacutil.exeIf you have Visual Studio installed, you can locate gacutil.exe in the SDK directory. This directory is usually located at C:\Program Files (x86)\Microsoft SDKs\Windows\vX.XA\bin\NETFX X.X Tools\. If you don’t have Visual Studio, you may have to install the .NET Framework SDK separately.

3. Use the Developer Command Prompt
Open the Developer Command Prompt for Visual Studio as an administrator. If you don’t have Visual Studio, use a command prompt with administrative privileges.
Open the Developer Command Prompt for Visual Studio as an administrator. If you don’t have Visual Studio, use a command prompt with administrative privileges.
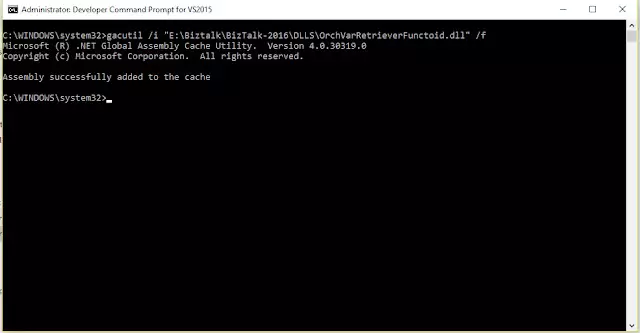
4. Run gacutil
Use the following command to install your DLL into the GAC:
gacutil -i path_to_your_dll
or
gacutil /i path_to_your_dll
Replace path_to_your_dll with the actual path to your DLL file
Use the following command to install your DLL into the GAC:
gacutil -i path_to_your_dll
or
gacutil /i path_to_your_dll
Replace path_to_your_dll with the actual path to your DLL file
Uninstall DLL
Use the following command to uninstall your DLL:
gacutil -u your_dll_name
or
gacutil /u your_dll_name
Replace your_dll_name with the actual name of your DLL file
gacutil -u your_dll_name
or
gacutil /u your_dll_name
Replace your_dll_name with the actual name of your DLL file
Note: Remember to run these commands with administrative privileges, as modifying the GAC requires elevated permissions